Video Editing - Creating Fade ins and Fade outs
Using Video Keyframes
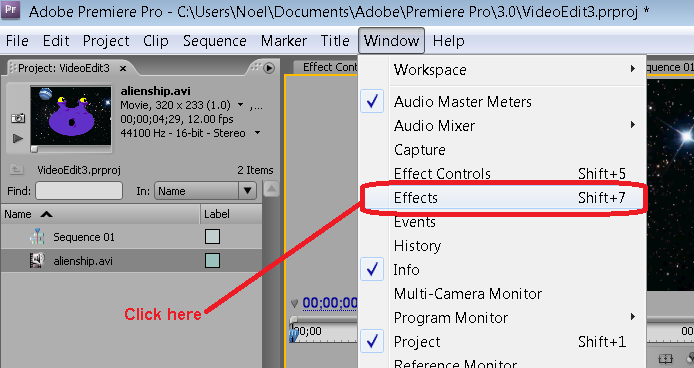
First start a new project and call it VideoEdit3 and download the clip alienship.avi here. Import this clip into your project and drag it over to the timeline and source/edit window as before. Next select Window >> Effects from the main menu and click 'Effects' as shown below:
First start a new project and call it VideoEdit3 and download the clip alienship.avi here. Import this clip into your project and drag it over to the timeline and source/edit window as before. Next select Window >> Effects from the main menu and click 'Effects' as shown below:
Creating a Fade to black:
1. Select and open up 'Video Transitions'..
2. Then drag the element 'Dip to Black' down to the right of the clip in the time line window i.e. at the end of the clip.
3. Now play the video in the output window and you should see the end of your clip fade to black. See screenshot below:

Fade-ins using Brightness/Contrast effects:
1. On the Effects panel (project window) select 'Video Effects'.
2. Then select the 'Effect Controls' tab from the source/edit window.
3. From the drop down menu on the Effects panel in the project window select and drag 'Brightness and Contrast' over to 'Video Effects' on the effects control panel. See screenshot below:
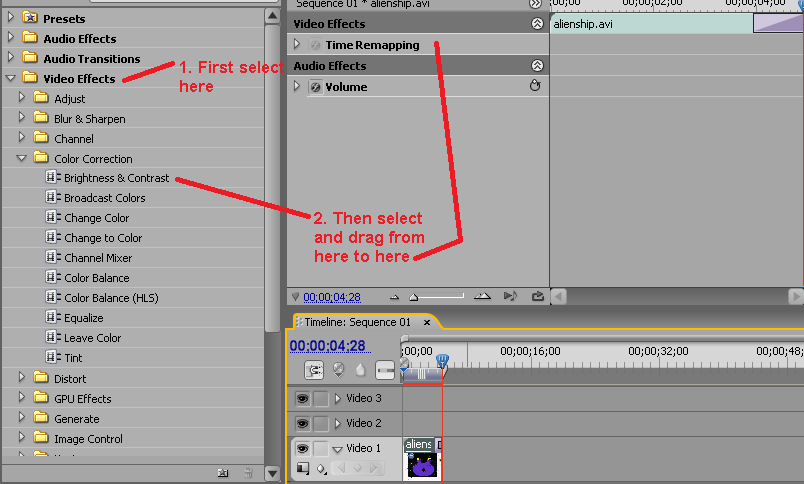
Now a new option will appear in the effects tab of the source/Edit window called 'Brightness and Contrast'.
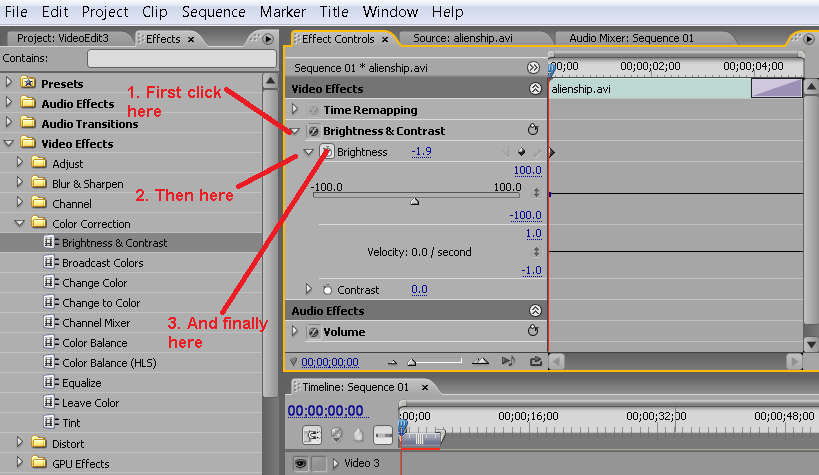
4. Click on the first triangle to get Brightness and Contrast options and then click on the triangle corresponding to 'Brightness'.
5. Beside this there is a little stopwatch symbol for 'toggle animation', click on this to get the following screenshot:
4. Click on the first triangle to get Brightness and Contrast options and then click on the triangle corresponding to 'Brightness'.
5. Beside this there is a little stopwatch symbol for 'toggle animation', click on this to get the following screenshot:
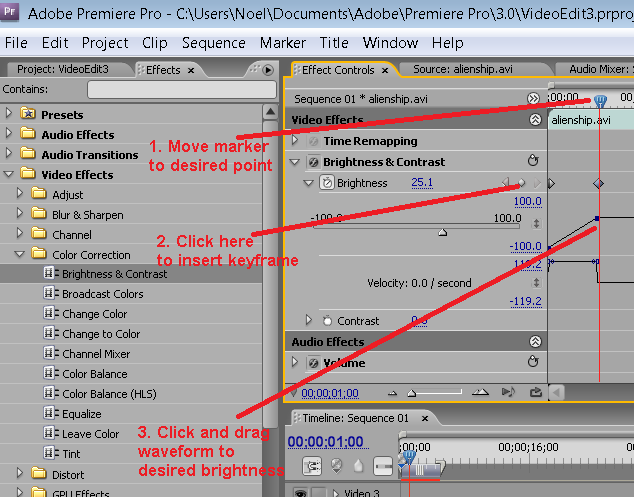
6. Next move the marker to the start of the clip and drag the dark line to the right down near the bottom (or use the brightness slider control) to get a dark first frame.
7. Now move the main marker to the point you wish full brightness to resume and then click on the 'Add/Remove Keframe' button just to the right of the 'Brightness' drop down option (see screenshot below). This inserts a keyframe at this point.
8. Then simply click and drag the black line as before up to the desired brightness level. See screenshot below:
Note: This is a linear fade-in. More complex forms can be created by using more keyframes and creating the appropriate 'curve' describing how the clip should fade in. This process simply creates a mathematical curve describing how the brightness of the clip should behave over time.
The same process can be done on the audio channels of the clip by selecting the audio and proceeding as before. This will cause the volume of the sound to increase as the clip is played.
